")
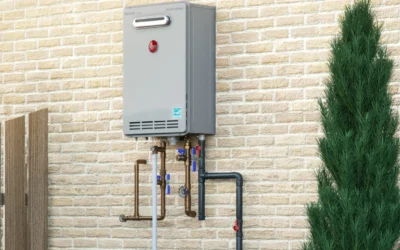
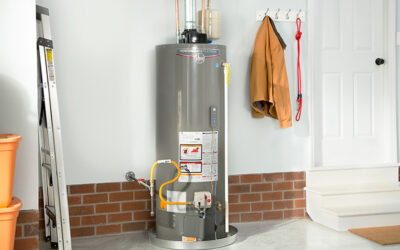
If your water dispenser is not heating, it can be a frustrating problem to deal with. However, with the right knowledge and steps, you can easily repair it yourself. There are several common causes for a water dispenser not heating, including a faulty heating element, malfunctioning thermostat, or electrical issues. In this guide, we will provide you with a step-by-step process to repair your water dispenser and also offer preventive measures to avoid heating issues in the future. We will also address frequently asked questions related to water dispenser heating problems. By following our instructions and taking the necessary precautions, you can ensure that your water dispenser functions properly and provides you with hot water whenever you need it.
Common Causes of a Water Dispenser Not Heating
There are several common causes for a water dispenser not heating, including a faulty heating element, malfunctioning thermostat, and electrical issues.
1. Faulty Heating Element
A faulty heating element is one of the common causes of a water dispenser not heating. The heating element is responsible for heating the water in the dispenser, and if it becomes faulty or damaged, it will no longer be able to perform its function effectively. This can result in the water dispenser not heating the water properly or not heating it at all. To determine if the heating element is faulty, it is important to disconnect the power and remove the back panel of the dispenser. A multimeter can be used to test the continuity of the heating element. If there is no continuity, then the heating element needs to be replaced. It is recommended to consult a professional technician or refer to the user manual for specific instructions on replacing the heating element.
2. Malfunctioning Thermostat
A malfunctioning thermostat is another common cause of a water dispenser not heating. The thermostat is responsible for regulating the temperature of the heating element in the dispenser. If it is faulty, it may not be able to accurately detect or control the temperature, resulting in a dispenser that fails to heat the water properly.
To address this issue, you can follow a step-by-step guide to repair a malfunctioning thermostat. First, make sure to disconnect the power to the water dispenser to avoid any electrical accidents. Then, carefully remove the back panel of the dispenser to gain access to the thermostat.
Next, test the thermostat using a multimeter to check if it is functioning correctly. If the readings indicate that it is faulty, you may need to replace the thermostat with a new one. Ensure that you purchase the correct thermostat model compatible with your water dispenser.
Inspecting the electrical connections is also crucial during this repair process. Faulty wiring or loose connections can impact the performance of the thermostat. Make sure all the connections are secure and in good condition.
By addressing the issue of a malfunctioning thermostat, you can restore the proper functioning of your water dispenser and ensure that it heats the water effectively. Remember to always prioritize safety and consult a professional if you are unsure about any electrical repairs.
3. Electrical Issues
Electrical issues can often be a culprit behind a water dispenser not heating properly. When there are electrical problems, it can disrupt the flow of power to the heating element or thermostat, resulting in no heat being generated. Some common electrical issues include loose connections, damaged wires, or a faulty power supply.
To address electrical issues with a water dispenser, it is crucial to start by disconnecting the power source to ensure safety. Then, carefully inspect the electrical connections for any loose or damaged wires. Tightening connections or replacing damaged wires can help restore the electrical flow.
If the electrical connections appear to be intact, it may be necessary to test the power supply using a multimeter. This will help determine whether the power source is providing the correct voltage to the dispenser. If the voltage is not within the recommended range, it may be necessary to contact a professional electrician to address the issue.
Remember, when dealing with electrical components, it is always best to prioritize safety. If you are unsure or uncomfortable working with electricity, it is advisable to seek professional assistance to avoid any potential hazards.
Step-by-Step Guide to Repair a Water Dispenser Not Heating
In this section, you will find a detailed step-by-step guide on how to repair a water dispenser that is not heating. The guide will provide clear instructions on disconnecting the power, removing the back panel, testing the heating element, checking the thermostat, and inspecting the electrical connections.
1. Disconnect the Power
To begin repairing a water dispenser that is not heating, the first step is to disconnect the power. This is an essential safety measure that ensures you can work on the dispenser without any risk of electric shock. Locate the power cord of the dispenser and unplug it from the electrical outlet. If the dispenser is directly wired into the electrical system, you will need to turn off the circuit breaker or remove the fuse that supplies power to the dispenser. Always exercise caution and double-check that the power is truly disconnected before proceeding with any repairs.
2. Remove the Back Panel
To repair a water dispenser that is not heating, one of the steps involved is removing the back panel. This step allows access to the internal components of the dispenser, such as the heating element and thermostat. By removing the back panel, you can visually inspect these parts and determine if any repairs or replacements are necessary.
To remove the back panel, start by disconnecting the power supply to the water dispenser to ensure safety. Locate the screws or fasteners that hold the panel in place. Use the appropriate tools, such as a screwdriver, to carefully remove these screws.
Once the screws are removed, gently pull the back panel away from the dispenser. Take caution not to force or damage any wires or connections during this process. Set the panel aside in a safe place where it won’t get damaged.
With the back panel removed, you now have a clear view of the internal components. Take a moment to visually inspect the heating element and thermostat. Look for any signs of damage, such as burnt wires or loose connections. If you notice any issues, further troubleshooting or repair may be required.
Remember to reconnect the power supply only after you have completed the necessary repairs or inspections. It is crucial to follow safety precautions and guidelines when working with electrical appliances.
By removing the back panel, you can effectively access the internal components of the water dispenser and proceed with the necessary repairs to address the heating issue.
3. Test the Heating Element
To test the heating element of a water dispenser that is not heating, follow these steps:
1. Disconnect the Power: Before conducting any tests or repairs, ensure that the water dispenser is unplugged or the power is turned off to prevent any electrical accidents.
2. Remove the Back Panel: Locate and remove the back panel of the water dispenser. This will provide access to the internal components, including the heating element.
3. Test the Heating Element: Using a multimeter set to the resistance mode, carefully test the heating element for continuity. Place the multimeter probes on the terminals of the heating element and check if there is any resistance indicated on the multimeter display. If there is no continuity or infinite resistance, it indicates a faulty heating element that needs to be replaced.
4. Check the Thermostat: While testing the heating element, also check the thermostat for any signs of damage or malfunction. Ensure that it is properly connected and functioning correctly. If the thermostat is faulty, it may be causing the heating element not to heat the water properly.
5. Inspect the Electrical Connections: Examine all the electrical connections in the water dispenser, including those related to the heating element. Look for any loose or damaged wires that may be causing the heating issue. Tighten or replace any faulty connections to ensure proper electrical flow.
By following these steps and conducting a thorough test of the heating element, you can determine if it is the cause of the water dispenser not heating. If the heating element is found to be faulty, it is recommended to replace it with a compatible and high-quality replacement part to restore the proper functioning of the water dispenser.
4. Check the Thermostat
To address the issue of a water dispenser not heating, it is essential to check the thermostat. The thermostat plays a crucial role in regulating and maintaining the desired temperature of the water in the dispenser. If the thermostat is faulty or malfunctioning, it can prevent the heating element from functioning properly.
To check the thermostat, start by disconnecting the power to the water dispenser to ensure safety. Then, remove the back panel of the dispenser to gain access to the internal components. Locate the thermostat, which is typically a small device with temperature control settings.
Using a multimeter or a continuity tester, carefully test the thermostat for any signs of malfunction. Check if the thermostat is receiving power and if it is able to accurately detect and regulate the temperature. If the thermostat fails the test or shows any signs of damage or irregularity, it is likely the cause of the heating issue.
In such cases, it is recommended to replace the faulty thermostat with a new one. Ensure that the replacement thermostat is compatible with your specific water dispenser model. Follow the manufacturer’s instructions for installation and calibration to ensure proper functioning.
Regularly checking and maintaining the thermostat is crucial to prevent heating issues in the water dispenser. If you notice any unusual temperature fluctuations or inconsistent heating, it is advisable to inspect the thermostat and address any issues promptly.
5. Inspect the Electrical Connections
Inspecting the electrical connections is an essential step in the process of repairing a water dispenser that is not heating. Faulty electrical connections can often be the cause of this issue, so it is crucial to carefully examine them to identify any potential problems.
To begin with, ensure that the power to the water dispenser is disconnected before inspecting the electrical connections. This is essential to prevent any accidents or electric shocks during the inspection process.
Once the power is disconnected, remove the back panel of the water dispenser to gain access to the internal components. Take a close look at the electrical connections, including the wires, terminals, and connectors. Look for any signs of damage, loose connections, or corrosion.
If you notice any loose connections, tighten them appropriately using a screwdriver or pliers. Additionally, check for any damaged wires or connectors. If any are found, they should be replaced with new ones to ensure a secure and reliable electrical connection.
It is also important to inspect the electrical connections for any signs of corrosion. Corrosion can hinder the flow of electricity and cause heating issues in the water dispenser. If corrosion is present, clean the affected areas using an appropriate electrical cleaner or a solution of vinegar and water.
After inspecting and addressing any issues with the electrical connections, reassemble the back panel and reconnect the power to the water dispenser. Test the dispenser to see if the heating problem has been resolved.
Regularly inspecting the electrical connections of your water dispenser can help prevent heating issues in the future. By ensuring that all connections are secure and in good condition, you can maintain the proper functioning of the heating element and thermostat, thus extending the lifespan of your water dispenser.
Preventive Measures for Water Dispenser Heating Issues
Preventive measures such as regular cleaning and maintenance, avoiding overloading the dispenser, and using the correct voltage can help prevent heating issues in a water dispenser.
1. Regular Cleaning and Maintenance
Regular cleaning and maintenance are crucial for ensuring the proper functioning of your water dispenser. Over time, mineral deposits, dirt, and bacteria can accumulate inside the dispenser, leading to clogs and potential health risks. By regularly cleaning and maintaining your water dispenser, you can prevent these issues and extend the lifespan of the appliance.
To begin, start by disconnecting the power supply to the water dispenser to ensure your safety. Next, remove any removable parts, such as the drip tray or water reservoir, and wash them with warm, soapy water. Use a soft brush or sponge to scrub away any stubborn stains or mineral deposits.
Pay special attention to the dispensing nozzle or faucet, as this area tends to accumulate bacteria and mold. Use a small brush or pipe cleaner to clean inside the nozzle and remove any debris. Rinse all the parts thoroughly and allow them to air dry before reassembling the dispenser.
In addition to regular cleaning, it’s essential to perform maintenance tasks to keep your water dispenser in optimal condition. Check the filter regularly and replace it as recommended by the manufacturer. This ensures that the water you dispense is clean and free from impurities.
Inspect the seals and gaskets of the dispenser for any signs of wear or damage. If you notice any cracks or leaks, replace the faulty parts promptly to prevent further issues.
Lastly, consider scheduling professional maintenance for your water dispenser. A technician can perform a thorough inspection, clean hard-to-reach areas, and address any underlying issues that may affect the heating or cooling mechanisms.
By following these regular cleaning and maintenance practices, you can ensure that your water dispenser remains in excellent condition, providing you with clean and heated water whenever you need it.
2. Avoid Overloading the Dispenser
One important preventive measure to avoid water dispenser heating issues is to avoid overloading the dispenser. Overloading the dispenser can put excessive strain on the heating element and other components, leading to malfunctions and decreased performance.
To prevent overloading, it is essential to follow the manufacturer’s guidelines regarding the maximum capacity of the dispenser. Do not exceed the recommended amount of water or place heavy objects on top of the dispenser. Additionally, avoid filling large containers that may exceed the dispenser’s capacity.
By not overloading the dispenser, you can ensure that the heating element operates efficiently and effectively, providing you with hot water whenever needed. Regularly monitoring the dispenser’s capacity and avoiding overloading can help prolong its lifespan and prevent unnecessary repairs or replacements.
3. Use the Correct Voltage
Using the correct voltage is crucial for ensuring the proper functioning of a water dispenser and preventing heating issues. When the dispenser is not receiving the appropriate voltage, it may not be able to generate enough heat to warm the water. This can result in lukewarm or cold water coming out of the dispenser.
To avoid this problem, it is important to check the voltage requirements specified by the manufacturer. Most water dispensers operate on standard household voltages, typically 110-120 volts. However, some models may have different voltage requirements, so it is essential to verify this information.
If you find that the voltage supplied to your water dispenser is incorrect, you may need to make adjustments. This could involve contacting an electrician to ensure that the electrical wiring in your home is providing the correct voltage to the dispenser. Alternatively, you may need to use a voltage regulator or transformer to adjust the voltage to the appropriate level.
Using the correct voltage not only ensures that your water dispenser heats the water effectively but also helps to prevent any electrical issues or damage to the appliance. It is always recommended to follow the manufacturer’s guidelines and consult a professional if you are unsure about the voltage requirements or how to adjust it properly.
FAQ
The FAQ section provides answers to common questions related to water dispenser heating issues, including why the dispenser may not be heating, how to repair the heating element, the frequency of cleaning the dispenser, what to do if the thermostat is faulty, and whether it is safe to use the dispenser without heating.
1. Why is my water dispenser not heating?
There can be several reasons why your water dispenser is not heating. One common cause is a faulty heating element. Over time, the heating element may wear out or become damaged, preventing it from effectively heating the water. Another possible reason is a malfunctioning thermostat. If the thermostat is not functioning properly, it may not signal the heating element to turn on, resulting in no heat being produced. Additionally, electrical issues can also contribute to a water dispenser not heating. Faulty wiring or connections can disrupt the flow of electricity to the heating element, causing it to malfunction. It is important to diagnose and address these issues in order to restore the proper heating functionality of your water dispenser.
2. Can I repair the heating element myself?
Yes, you can repair the heating element of your water dispenser yourself. However, it is important to note that repairing electrical components can be dangerous if you are not familiar with the necessary precautions and procedures.
Before attempting any repairs, make sure to disconnect the power to the water dispenser to avoid any risk of electrical shock. Once the power is disconnected, you can proceed with accessing the heating element.
To repair the heating element, start by removing the back panel of the water dispenser. This will give you access to the internal components, including the heating element. Carefully inspect the heating element for any visible signs of damage or malfunction.
If you notice any obvious issues such as cracks, breaks, or burn marks on the heating element, it may need to be replaced. Contact the manufacturer or a professional technician to obtain a replacement heating element and follow the manufacturer’s instructions for installation.
In some cases, the heating element may not show any visible signs of damage, but it may still be faulty. To test the heating element, you can use a multimeter to check for continuity. If there is no continuity, it indicates a problem with the heating element, and it should be replaced.
If you are unsure about repairing the heating element yourself or if the issue persists after attempting the repair, it is recommended to seek assistance from a qualified technician. They will have the necessary expertise and tools to diagnose and fix the problem safely.
Remember, always prioritize your safety when working with electrical components and consider consulting a professional if you are uncertain about any aspect of the repair process.
3. How often should I clean the water dispenser?
Cleaning the water dispenser on a regular basis is crucial for maintaining its optimal performance and ensuring the longevity of the appliance. The frequency of cleaning depends on various factors such as the quality of water being dispensed and the usage patterns. However, it is generally recommended to clean the water dispenser every three to six months.
To clean the water dispenser, start by disconnecting the power supply and emptying the reservoir. Remove any removable parts such as the drip tray, water reservoir, and filters, if applicable. Wash these parts with warm soapy water, ensuring all residue and buildup are removed. Rinse them thoroughly and allow them to air dry.
Next, clean the interior of the water dispenser. Use a mixture of equal parts white vinegar and water to clean the reservoir and the dispensing area. Pour the solution into the reservoir and let it sit for about 15 minutes to dissolve any mineral deposits or bacteria. Scrub the interior with a soft brush to remove any stubborn stains or buildup. Rinse the reservoir thoroughly with clean water to remove any vinegar residue.
After cleaning, reassemble all the parts and ensure they are properly secured. Connect the power supply and allow the dispenser to run for a few minutes to flush out any remaining vinegar or cleaning solution. Dispose of the first few dispensed water to ensure it is clean and free from any residual cleaning agents.
In addition to regular cleaning, it is also important to practice good maintenance habits. This includes wiping down the exterior of the dispenser regularly, avoiding placing hot or heavy objects on the dispenser, and following any specific manufacturer guidelines for maintenance.
By following these cleaning guidelines and incorporating regular maintenance practices, you can keep your water dispenser in optimal condition and prolong its lifespan.
4. What should I do if the thermostat is faulty?
If the thermostat in your water dispenser is faulty, there are a few steps you can take to address the issue. First, disconnect the power to the dispenser to ensure your safety. Then, remove the back panel to gain access to the thermostat. Check for any visible signs of damage or wear.
If the thermostat appears to be faulty, it is recommended to replace it with a new one. You can find compatible thermostats either online or at a local appliance repair store. Make sure to follow the manufacturer’s instructions for installation.
Before replacing the thermostat, it is important to test it to confirm that it is indeed faulty. This can be done using a multimeter to measure the continuity of the thermostat. If there is no continuity, it indicates a faulty thermostat that needs to be replaced.
Once the faulty thermostat has been replaced, reassemble the dispenser and reconnect the power. Test the dispenser to ensure that the heating function is working properly.
Remember, if you are unsure about replacing the thermostat yourself or if the issue persists even after replacing it, it is recommended to seek professional assistance from a qualified technician.
5. Is it safe to use the water dispenser without heating?
It is not recommended to use a water dispenser without heating. The purpose of a water dispenser is to provide hot water for various uses such as making hot beverages, instant soups, or other hot water needs. If the water dispenser is not heating, it may be an indication of a malfunctioning heating element or thermostat, which should be addressed and repaired. Using a water dispenser without heating can compromise the functionality and convenience it offers. Therefore, it is advisable to follow the necessary repair steps or seek professional assistance to ensure the safe and efficient operation of the water dispenser.