")
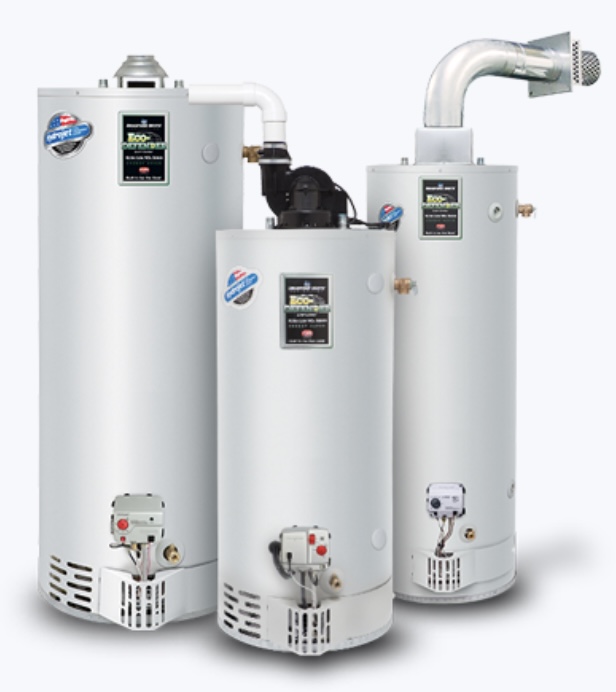
Repairing a leaking water heater is a crucial task that homeowners may need to tackle at some point. Water heater leaks can occur due to various reasons, and it is essential to understand the causes behind them to effectively address the issue. Identifying the location and severity of the leak is the first step towards finding a solution. DIY repair methods can be employed for small water heater leaks, including steps to stop the leak and repairing the tank or hot water heater valve. However, gas water heater leaks require additional precautions such as shutting off the gas supply and replacing the gas control valve or fixing a leaking gas water heater pipe. Similarly, electric water heater leaks necessitate turning off the power and addressing faults like replacing a faulty heating element or fixing a leaking electric water heater pressure relief valve. For further information and answers to common questions about repairing water heater leaks, refer to the FAQ section below.
Understanding Water Heater Leaks
Understanding water heater leaks is crucial for effectively repairing and addressing any issues with your water heater. By identifying the causes and location of the leaks, as well as assessing the severity, you can take appropriate steps to fix the problem and prevent further damage.
What Causes a Water Heater to Leak?
Water heaters can develop leaks due to a variety of reasons, such as corrosion, excessive pressure, faulty valves, or worn-out components.
Identifying the Location of the Leak
To identify the location of a water heater leak, there are a few steps you can follow. Firstly, visually inspect the area around the water heater for any signs of water pooling or dripping. Check the floor, walls, and pipes connected to the heater. If you don’t see any visible signs of a leak, you can use a dry towel or tissue to wipe down the various components of the water heater, such as the tank, valves, and pipes. Pay close attention to any areas that feel damp or where the towel becomes wet. These could be indicators of a leak. Additionally, listen for any hissing or gurgling sounds near the water heater, as they could point to a leak as well. Identifying the location of the leak is crucial in determining the appropriate repair method.
Assessing the Severity of the Leak
When it comes to dealing with a leaking water heater, assessing the severity of the leak is crucial. By understanding the extent of the problem, you can determine the appropriate course of action and whether a professional plumber needs to be contacted. To assess the severity of the leak, start by examining the amount of water being released. A small drip may indicate a minor issue that can be resolved with DIY repairs, while a steady stream of water suggests a more significant problem that may require professional intervention. Additionally, consider the location of the leak and its impact on the surrounding area. Assessing the severity of the leak allows you to make informed decisions and take the necessary steps to address the issue promptly.
DIY Water Heater Leak Repair
Learn how to fix small water heater leaks on your own with step-by-step instructions and tips for repairing a leaking water heater tank and a leaky hot water heater valve.
Steps to Stop a Small Water Heater Leak
If you notice a small water heater leak, it is important to take immediate action to prevent further damage. Follow these steps to stop a small water heater leak:
- Step 1: Turn off the power supply to the water heater. This will help avoid any electrical hazards.
- Step 2: Shut off the water supply to the water heater. Locate the shut-off valve connected to the cold water inlet pipe and turn it clockwise to close it.
- Step 3: Drain the water heater tank. Connect a hose to the drain valve at the bottom of the tank and place the other end in a suitable drain or outside area. Open the drain valve and allow the water to drain completely.
- Step 4: Once the tank is empty, inspect the area where the leak is occurring. If it is a small crack or hole, you can temporarily patch it up using epoxy or a pipe repair clamp.
- Step 5: Turn on the water supply to the water heater and check for any new leaks. If the leak persists, it is recommended to contact a professional plumber for further assistance.
- Step 6: Finally, turn on the power supply to the water heater and monitor it closely for any signs of leakage. If everything appears to be functioning properly, you have successfully stopped the small water heater leak.
By following these steps, you can quickly address a small water heater leak and prevent it from causing further damage to your water heater and surrounding areas.
Repairing a Leaking Water Heater Tank
Repairing a leaking water heater tank requires a few steps to ensure the problem is properly addressed. First, turn off the power supply to the water heater to avoid any potential hazards. Next, drain the tank by attaching a hose to the drain valve and allowing the water to flow out. Once the tank is empty, inspect it for any visible signs of damage or corrosion. Use a wire brush to clean the affected area and remove any rust or debris. If the leak is small, you can apply a sealant or epoxy to the damaged area to temporarily fix the leak. However, for larger leaks or more severe damage, it may be necessary to replace the tank altogether.
Fixing a Leaky Hot Water Heater Valve
If you have a leaky hot water heater valve, it is important to address the issue promptly to prevent further damage. Here are the steps to fix a leaky hot water heater valve:
- Turn off the power supply to the water heater.
- Close the cold water supply valve to the water heater.
- Attach a garden hose to the drain valve at the bottom of the water heater.
- Place the other end of the hose in a floor drain or outside where it can safely drain.
- Open the drain valve to release any remaining water from the tank.
- Once the tank is empty, use a wrench to loosen the nut on the leaky valve.
- Remove the valve and inspect it for any damage or wear.
- If necessary, replace the valve with a new one of the same size and type.
- Tighten the nut on the new valve securely.
- Remove the hose from the drain valve and close the drain valve.
- Open the cold water supply valve to refill the tank.
- Check for any leaks around the newly installed valve.
- Once the tank is full, turn on the power supply to the water heater.
By following these steps, you can fix a leaky hot water heater valve and ensure the proper functioning of your water heating system.
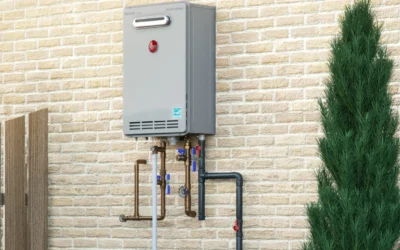
Repairing Gas Water Heater Leaks
When it comes to repairing gas water heater leaks, it is crucial to first shut off the gas supply before addressing the issue. Depending on the specific problem, options for repair may include replacing the gas control valve or fixing a leaking gas water heater pipe.
Shutting Off the Gas Supply
To shut off the gas supply to your water heater, follow these steps:
- Locate the gas supply valve. It is typically located near the bottom of the water heater.
- Turn the valve handle clockwise to shut off the gas supply. Make sure it is fully closed.
- Check for any gas odors or leaks. If you detect a strong gas smell, leave the area immediately and contact a professional.
By shutting off the gas supply, you ensure the safety of your gas water heater and prevent any further leaks or accidents. It is important to handle gas-related tasks with caution and, if unsure, consult a professional for assistance.
Replacing the Gas Control Valve
To replace the gas control valve on your water heater, you will need a few tools and follow the steps below:
1. First, shut off the gas supply to the water heater. Locate the gas shut-off valve, usually found near the water heater or on the gas line leading to it. Turn the valve clockwise to shut off the gas.
2. Next, disconnect the gas line from the gas control valve. Use a wrench to loosen the fitting and carefully remove the gas line.
3. Once the gas line is disconnected, remove the screws or bolts securing the gas control valve to the water heater. Carefully lift the valve away from the heater.
4. Take note of the position and orientation of the old gas control valve. This will help ensure the new valve is installed correctly. Remove any fittings or connectors from the old valve that need to be transferred to the new valve.
5. Install the new gas control valve by aligning it with the mounting holes on the water heater. Secure it in place using the screws or bolts you removed earlier.
6. Reconnect the gas line to the new gas control valve. Use a wrench to tighten the fitting and ensure it is secure.
7. Finally, turn on the gas supply by turning the gas shut-off valve counterclockwise. Check for any gas leaks by applying a mixture of soap and water to the gas line connections. If you see any bubbles forming, there is a leak. In this case, tighten the fittings further or seek professional assistance.
Remember, if you are unsure or uncomfortable with performing this repair yourself, it is always best to consult a professional plumber for assistance.
Fixing a Leaking Gas Water Heater Pipe
To fix a leaking gas water heater pipe, it is crucial to first shut off the gas supply to ensure safety. Once the gas is turned off, carefully inspect the pipe for any visible leaks or damage. If there is a minor leak, you can use pipe sealant or plumber’s tape to seal the area. However, if the pipe is severely damaged or corroded, it may need to be replaced entirely. In such cases, it is recommended to consult a professional plumber to ensure proper installation and avoid any further issues. Remember to always prioritize safety when dealing with gas-related repairs.
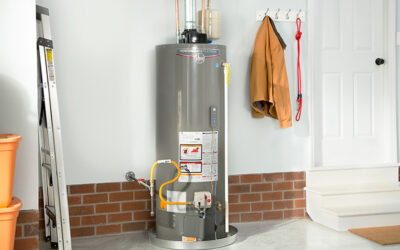
Repairing Electric Water Heater Leaks
When it comes to repairing electric water heater leaks, there are a few key steps to follow. First, make sure to turn off the power to the water heater before starting any repairs. Then, you can proceed with replacing any faulty heating elements that may be causing the leak. Additionally, if you notice a leaking electric water heater pressure relief valve, it will need to be fixed or replaced. By following these steps, you can effectively address and repair electric water heater leaks.
Turning Off the Power
When it comes to repairing electric water heater leaks, one important step is turning off the power. This is crucial for safety reasons, as working with live electrical components can be extremely dangerous. To turn off the power to the electric water heater, you should locate the circuit breaker or fuse box that controls the heater. Flip the breaker switch or remove the fuse that corresponds to the water heater circuit. This will effectively cut off the power supply to the heater, ensuring that you can work on it safely without the risk of electric shock. Remember to exercise caution and follow proper electrical safety procedures when dealing with any electrical components.
Replacing a Faulty Heating Element
To replace a faulty heating element in an electric water heater, you will need to follow a few simple steps. First, turn off the power supply to the water heater at the main electrical panel. This is crucial to ensure your safety during the repair process. Next, drain the water heater by attaching a hose to the drain valve and emptying the tank. Once the tank is empty, locate the heating element on the side of the tank and use a wrench to loosen and remove the mounting screws. Carefully disconnect the wires attached to the heating element and remove it from the tank. Install the new heating element by reversing the steps, ensuring that it is securely fastened and the wires are properly connected. Finally, turn the power back on and test the water heater to ensure the heating element is functioning correctly.
Fixing a Leaking Electric Water Heater Pressure Relief Valve
To fix a leaking electric water heater pressure relief valve, you will need to follow a few simple steps. First, turn off the power to the water heater to ensure your safety. Next, locate the pressure relief valve, which is typically located on the side of the water heater tank. Place a bucket or container underneath the valve to catch any water that may be released. Use a wrench to carefully loosen the valve, allowing any excess pressure or water to escape. Once the valve is completely open, tighten it back up and check for any further leaks. If the leaking persists, it may be necessary to replace the pressure relief valve altogether.
FAQ
The FAQ section provides helpful answers to common questions about repairing a leaking water heater, such as whether it is possible to fix the issue yourself, steps to repair a hot water heater leak, what to do if the water heater tank is leaking, the cost of repairing a water heater leak, and the safety of using a water heater with an internal leak.
1. Can you repair a leaking water heater yourself?
Yes, you can repair a leaking water heater yourself by following the appropriate steps and using the necessary tools and materials.
2. How do you repair a hot water heater leak?
Repairing a hot water heater leak involves identifying the location of the leak, assessing the severity, and following the appropriate steps to fix it.
3. What should I do if my water heater tank is leaking?
If your water heater tank is leaking, it is important to immediately turn off the power and water supply, and then contact a professional plumber for repair or replacement.
4. How much does it cost to repair a water heater leak?
The cost of repairing a water heater leak can vary depending on the extent of the damage and the specific repairs needed.
5. Is it safe to use a water heater with an internal leak?
Using a water heater with an internal leak is not safe and should be addressed immediately to avoid further damage or potential hazards.