")
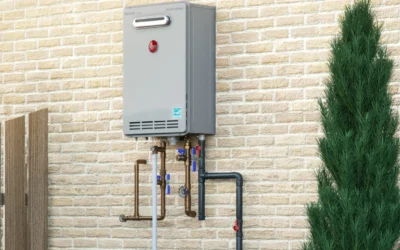
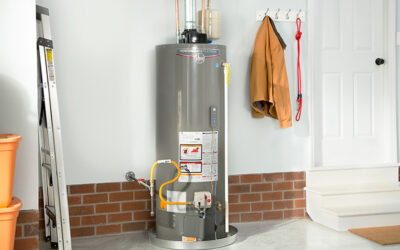
The “Guide to Repairing Water Heater Drain Valve” provides a comprehensive overview of the steps involved in repairing this crucial component of a water heater. The drain valve is responsible for draining excess water from the tank, preventing potential leaks and damage. Understanding the importance of a functioning drain valve is paramount before attempting any repairs. This guide will walk you through the process, from turning off the power supply and shutting off the water supply, to draining the water heater, removing the old drain valve, and installing a new one. By following these instructions, you can ensure the proper functioning and longevity of your water heater.
Introduction
The introduction section provides an overview of the importance of a functioning water heater drain valve and sets the stage for the subsequent steps and guides to repair and prevent common issues with the drain valve.
Understanding the importance of a functioning drain valve
Understanding the importance of a functioning drain valve is crucial for the proper operation and maintenance of a water heater. The drain valve serves as a means to release built-up pressure, sediment, and debris from the tank, preventing damage and prolonging the lifespan of the appliance. A malfunctioning or faulty drain valve can lead to various problems such as leaking, reduced efficiency, and potential damage to the water heater. Regularly checking and maintaining the drain valve ensures that it remains in good working condition, allowing for smooth operation and efficient performance of the water heater.
How to Repair Water Heater Drain Valve
In this section, we will provide a step-by-step guide on how to repair a water heater drain valve, including instructions on turning off the power supply, shutting off the water supply, draining the water heater, removing the old drain valve, and installing a new one.
Step 1: Turn off the power supply
To begin repairing the water heater drain valve, the first step is to turn off the power supply. This is crucial for ensuring safety during the repair process. By cutting off the power, you eliminate the risk of electrical shock while working on the drain valve. To do this, locate the circuit breaker or fuse box that controls the water heater and switch off the corresponding breaker or remove the fuse. It is important to double-check that the power is indeed off before proceeding to the next steps.
Step 2: Shut off the water supply
To shut off the water supply, follow the second step in the process. This step is crucial in preventing any further water flow into the water heater. Locate the main water supply valve, usually located near the water meter or in the basement. Turn the valve clockwise until it is fully closed. This will ensure that no additional water enters the water heater during the repair process.
Step 3: Drain the water heater
To drain the water heater, follow these steps:
- Turn off the power supply to the water heater.
- Shut off the water supply to the water heater.
- Drain the water heater by connecting a hose to the drain valve and directing the other end to a suitable drainage area.
By following these steps, you can effectively drain the water heater and proceed with the repair process.
Step 4: Remove the old drain valve
To remove the old drain valve from your water heater, follow these steps:
- Step 4: Remove the old drain valve
First, ensure that the power supply to the water heater is turned off. This will help prevent any accidents or electrical shocks during the process. Next, shut off the water supply to the heater by closing the inlet valve. This will prevent water from flowing out while you remove the drain valve. Once these precautions are in place, drain the water heater by attaching a hose to the drain valve and allowing the water to flow out into a suitable drain or container.
Now, you can proceed to remove the old drain valve. Use a wrench or pliers to loosen the valve by turning it counterclockwise. Be careful not to apply excessive force, as this may damage the valve or surrounding components. Once the valve is loose, continue to unscrew it until it can be completely removed from the water heater. Take note of any gaskets or seals that may be attached to the valve and make sure to remove them as well.
With the old drain valve removed, you can proceed to the next step of installing a new drain valve to complete the repair process.
Step 5: Install a new drain valve
Installing a new drain valve is an essential step in repairing a water heater. To begin, make sure you have a compatible replacement drain valve. Once you have the necessary replacement, start by wrapping the threads of the new drain valve with Teflon tape to ensure a secure and watertight seal. Then, carefully thread the new drain valve into the opening where the old one was removed. Use a wrench to tighten the valve snugly, but be careful not to overtighten and risk damaging the threads or the water heater. Once the new drain valve is securely in place, you can proceed with reassembling the water heater and restoring the power and water supply. It is important to test for any leaks after completing the installation to ensure the new drain valve is functioning properly.
Repairing Plastic Spigot on Hot Water Heater
Learn how to repair the plastic spigot on your hot water heater, including identifying the issue, step-by-step instructions for repairing it, and tips for preventing future issues.
Identifying the issue with the plastic spigot
To identify the issue with the plastic spigot on your hot water heater, you will need to visually inspect the spigot for any signs of damage or leakage. Look for cracks, breaks, or loose connections around the spigot. Additionally, check for any water pooling or dripping around the area, as this could indicate a problem with the spigot. If you notice any of these issues, it is likely that the plastic spigot needs to be repaired or replaced.
Step-by-step guide to repairing the plastic spigot
A step-by-step guide is provided below for repairing the plastic spigot on a hot water heater:
- Step 1: Turn off the power supply to the water heater.
- Step 2: Shut off the water supply to the water heater.
- Step 3: Drain the water heater by attaching a hose to the drain valve and directing the water to a suitable drainage location.
- Step 4: Identify the issue with the plastic spigot, such as cracks or leaks.
- Step 5: Use a wrench or pliers to loosen and remove any fittings or connections attached to the plastic spigot.
- Step 6: Carefully remove the damaged plastic spigot from the water heater.
- Step 7: Install a new plastic spigot by securely attaching it to the water heater using the appropriate fittings and connections.
- Step 8: Turn on the water supply and check for any leaks or issues with the newly installed plastic spigot.
- Step 9: Once confirmed that the plastic spigot is functioning properly, turn on the power supply to the water heater.
Following these steps will help you successfully repair the plastic spigot on your hot water heater and ensure its proper functioning.
Tips for preventing future issues with the plastic spigot
When it comes to preventing future issues with the plastic spigot on your hot water heater, there are a few key tips to keep in mind. Firstly, make sure to regularly inspect the spigot for any signs of wear or damage. If you notice any cracks or leaks, it’s important to address them promptly to avoid further issues. Additionally, consider installing a drain pan underneath the spigot to catch any potential leaks and prevent water damage. Lastly, be mindful of the temperature settings on your water heater, as excessively high temperatures can put strain on the plastic spigot. By following these preventative measures, you can help extend the lifespan of your plastic spigot and avoid costly repairs in the future.
Common Problems with Water Heater Drain Valve Repair
When it comes to repairing water heater drain valves, there are some common problems that homeowners may encounter, such as leaking drain valves, difficulty in removing the old drain valve, and improper installation of the new drain valve.
Leaking drain valve
A leaking drain valve is a common problem that can occur with water heaters. This issue can lead to water leakage, which can cause damage to the surrounding area and potentially result in higher utility bills. If you notice a leaking drain valve, it is important to address the problem promptly to prevent further damage. The first step in resolving this issue is to turn off the power supply to the water heater. Then, shut off the water supply to the heater to prevent further water flow. Next, drain the water heater completely to relieve pressure and ensure a safe work environment. Once the water heater is drained, you can inspect the drain valve for any visible signs of damage or wear. If necessary, remove the old drain valve and install a new one to resolve the leaking issue. By following these steps, you can effectively repair a leaking drain valve and maintain the proper functioning of your water heater.
Difficulty in removing the old drain valve
One common problem that may arise when repairing a water heater drain valve is the difficulty in removing the old drain valve. Over time, the drain valve can become stuck or corroded, making it challenging to loosen and remove. To address this issue, it is important to use the appropriate tools and techniques. Applying penetrating oil to the valve and using a wrench with a longer handle can help provide more leverage and make it easier to loosen the valve. It may also be necessary to apply gentle heat to the valve using a propane torch to help loosen any stubborn connections. Taking care and patience during the removal process can help prevent further damage to the water heater and ensure a successful repair.
Improper installation of the new drain valve
One of the common problems that can occur during water heater drain valve repair is the improper installation of the new drain valve. This can lead to issues such as leaks or difficulties in draining the water heater. It is important to ensure that the new drain valve is installed correctly to prevent any further problems. This may involve following specific instructions provided by the manufacturer or seeking professional help if needed. Proper installation of the new drain valve will ensure the efficient and effective functioning of the water heater.
FAQ
The FAQ section provides answers to common questions about water heater drain valve repair, such as how often to check the valve, whether it’s possible to repair a plastic spigot oneself, reasons for a leaking drain valve, the time required to replace a drain valve, and what to do if difficulties arise during the repair process.
1. How often should I check my water heater drain valve?
It is recommended to check your water heater drain valve at least once a year to ensure it is functioning properly and to prevent any potential issues.
2. Can I repair a plastic spigot on a hot water heater myself?
Yes, you can repair a plastic spigot on a hot water heater yourself by following a step-by-step repair guide.
3. Why is my water heater drain valve leaking?
A common issue with water heater drain valves is leakage, which can be caused by various factors such as worn-out gaskets, loose fittings, or corrosion. It is important to address this problem promptly to prevent further damage to the water heater system.
4. How long does it take to replace a water heater drain valve?
Replacing a water heater drain valve typically takes about 1-2 hours, depending on the complexity of the installation and any unforeseen issues that may arise during the process.
5. What should I do if I encounter difficulties while repairing the drain valve?
If you encounter difficulties while repairing the drain valve, there are a few steps you can take to troubleshoot the issue.